Retrocube
Retrocube is a project of using a GameCube case for a retropie project (retro gaming using raspberry pi) This first part describe the hardware of this project.
Project
The aim is to build a retro gaming console using :
- A GameCube case
- A Raspberry Pi (with retropie)
- 2 GameCube gamepad
The console should run :
- Without keyboard
- The original power button from the GameCube should be working
- The original reset button from the GameCube should be working
- The front gamepad connectors (2) should be working
- The GameCube should be powered through the original power supply unit or any other supply unit
Hardware Part
GameCube opening tool
The GameCube uses 4 special screw. We need to build a tool to open it. Such a tool can be made using a simple Bic :
- Remove the ballpoint part
- Carefully, burn the end of the pen with a lighter
- Quickly put the burned end of the pen onto one of the 4 screw and wait for the pen to cool down
- Then you can use this tool to remove the 4 screw
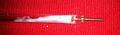
Game Cube opening tool
GameCube dismantling
Safely dismantle all the parts
Game Cube top removal
Game Cube front removal
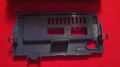
Game Cube back removal
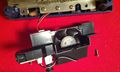
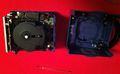
Game Cube fan removal
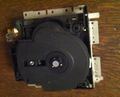
Game Cube cd reader removal
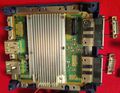
Game Cube cpu removal
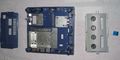
Game Cube main parts


GPIO to gamepad
The gamepad will use the gamecon_gpio_rpi driver which use the following GPIO pins:
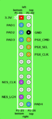
GPIO (rev2 pi)

Carefully identify each pins, i use small paper to identify the interesting wire :
- 3.3V
- 5V
- PAD1
- PAD2
- PAD3
- GROUND
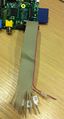
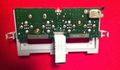
RaspberryPi GPIO

I found an adapter in an old dvd reader to connect the GPIO to the GameCube front panel. Each ( port 1 and port 2 ) gamecube controller should be connected to
- Pin2 to PAD2 or PAD3
- Pin3 to GROUND
- Pin6 to 3.3V
- Led to 5V
- Reset switch to PAD1
I used a continuity tester and the following connecter pinout to identify the wire :

GameCube socket pinout

Links
GameCube opening http://www.ifixit.com/Teardown/Nintendo+GameCube+Teardown/1727
gamecon_gpio_rpi driver https://github.com/petrockblog/RetroPie-Setup/wiki/gamecon_gpio_rpi
GameCube gamepad pinout http://www.int03.co.uk/crema/hardware/gamecube/gc-control.html